Step-by-Step Guide to Getting a German Student Visa
Picture this: you’ve just received an acceptance letter from a German university, and the next thing on your mind is the dreaded German student visa. That mix of excitement and anxiety feels all too familiar, doesn’t it?
You’re probably wondering whether you need to jump through endless paperwork, how long the process will take, and if you’ll ever see the campus in person before the semester starts.
The good news is, you don’t have to navigate this maze alone. With a clear roadmap and a few insider tips, the whole visa journey can become a series of manageable steps instead of a night‑marish slog.
In this guide we’ll break down everything you need to know about the German student visa – from the initial eligibility checklist to the final residence permit, and even the little details that most official sites forget to mention.
We’ll start by demystifying the core documents: proof of admission, financial proof, health insurance, and passport validity. Then we’ll walk through the online application portal, the visa interview, and the post‑arrival formalities that keep you on the right side of German immigration law.
Along the way you’ll get practical examples, like how a typical Sperrkonto balance looks in euros, or what a realistic timeline looks like when you apply in the spring versus the fall semester. These nuggets come from real students who have been through the process, so you can avoid the common pitfalls that trip up first‑timers.
And because we know time is precious, we’ll highlight the three biggest mistakes that waste money and delay approvals – like underestimating the required funds, forgetting to translate documents, or skipping the biometric appointment until the last minute.
By the end of this article you’ll have a cheat‑sheet you can print, a checklist you can tick off, and the confidence to submit your German student visa application without second‑guessing every line.
So, ready to turn that nervous flutter into a concrete plan? Let’s dive in and get you one step closer to studying in Germany.
TL;DR
Getting your German student visa is easier when you follow a clear roadmap: gather admission proof, secure a Sperrkonto with enough funds, get health insurance, and keep your passport valid for at least six months.
Use our step‑by‑step checklist, avoid common pitfalls like untranslated documents or last‑minute biometrics, and you’ll submit a complete application that speeds approval, letting you focus on packing and excitement for university life.
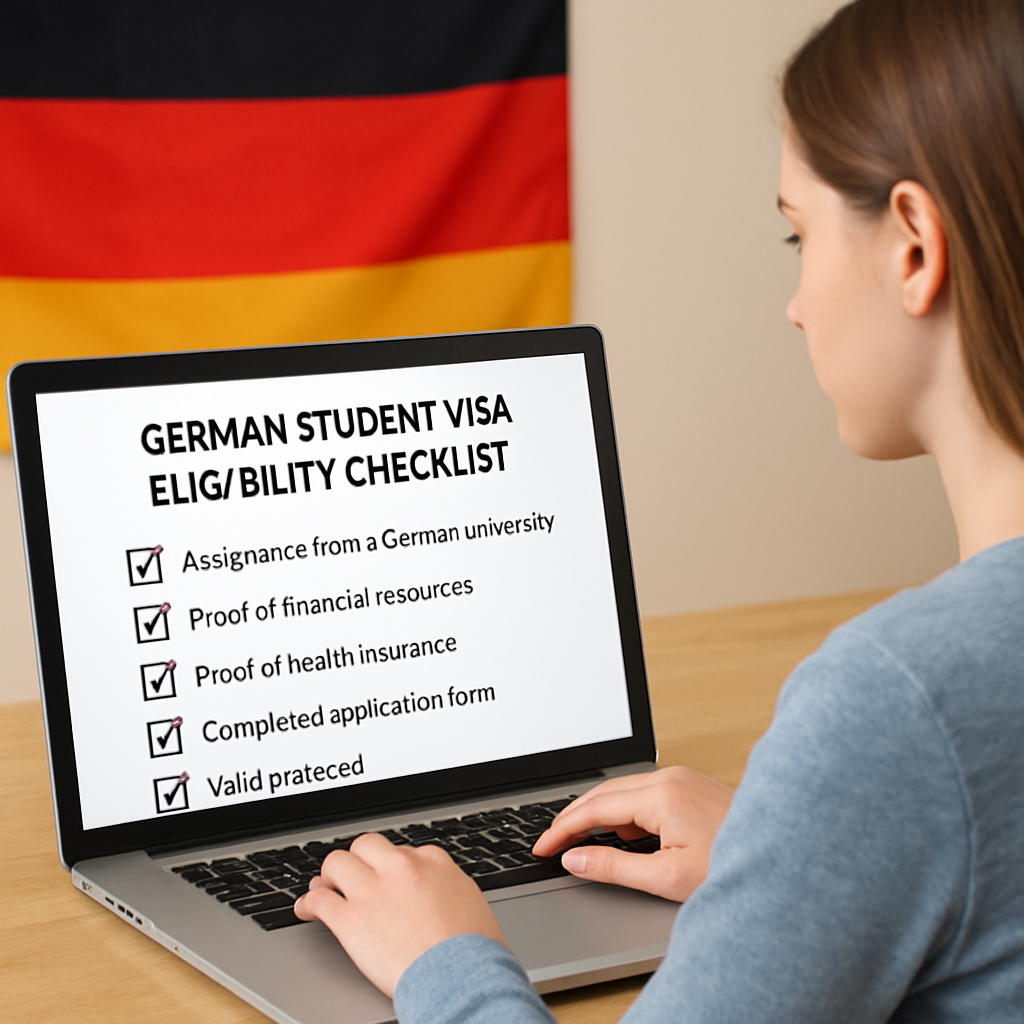
Step 1: Determine Eligibility for a German Student Visa
So you’ve got that acceptance email glowing on your screen, and now the big question looms: are you even eligible for a German student visa? It’s a moment that feels both thrilling and a little intimidating, and trust me, you’re not alone.
First thing’s first – the German embassy looks for three core pillars: a confirmed place at a German university, proof you can support yourself financially, and valid health insurance. If any of those pieces are missing, the process stalls faster than a Berlin traffic light during rush hour.
Check your admission status
Make sure your admission letter is official, signed, and – if it’s in a language other than German or English – translated by a certified translator. The letter should clearly state the program name, start date, and the duration of your studies. Without this, the visa officer can’t verify why you’re heading to Germany.
Financial proof is non‑negotiable
Germany wants to see you can cover living costs, roughly €11,208 per year (about €934 per month). Most students open a Sperrkonto – a blocked account – and deposit the full amount before applying. You’ll receive an official statement showing the balance, which you attach to your visa file.
If you’re wondering whether a scholarship or part‑time job can replace the Sperrkonto, the answer is: only if the scholarship covers the whole amount and is documented in a recognized format. Otherwise, you’ll still need the blocked account.
Health insurance matters
German law requires you to have health insurance that’s valid for the entire stay. Public statutory insurance works for most students, but if you have private coverage, double‑check that it meets the German criteria. A missing insurance certificate is a common reason applications get sent back.
And here’s a quick sanity check: open a spreadsheet, list each requirement, and tick them off one by one. Seeing the blanks disappear is oddly satisfying and keeps you from forgetting that passport must be valid for at least six months beyond your intended stay.
Need a hand navigating these paperwork hurdles? Our visa support services walk you through every document, translating, and even booking your biometric appointment, so you don’t waste time figuring it out on your own.
Now, let’s bring the theory to life with a short video that walks you through the eligibility checklist step by step. Grab a coffee, hit play, and pause whenever you need to jot something down.
After watching, you’ll have a clear picture of what the German consulate expects. Remember, the goal isn’t to overwhelm you but to give you a roadmap you can actually follow.
Once you’ve confirmed you meet all three pillars, the next step is to gather the documents into a tidy folder. Use separate sections for admission, finance, and insurance – it makes the visa interview smoother and shows you’re organized.
Pro tip: print every document twice. Keep one set for the embassy, and keep a backup in a secure cloud folder. If something gets lost, you’ll have a ready copy without scrambling for a last‑minute scan.
Finally, give yourself a realistic timeline. Apply at least three months before your semester starts, because biometric appointments can fill up fast, especially in peak months like July and August.
By the end of this checklist, you’ll know exactly whether you’re eligible, and if you’re not, you’ll see the exact gap you need to fill. No more guessing, no more panic.
Ready to turn that eligibility doubt into confidence? Let’s keep the momentum going and move on to gathering the actual paperwork.
Step 2: Gather Required Documents
Alright, you’ve passed the eligibility check – now it’s time to turn that green light into a stack of paperwork.
Does the idea of hunting down every single document feel a bit like a scavenger hunt? Trust me, you’re not alone, and the good news is you can make it painless.
1️⃣ Admission proof – your ticket in
First thing’s first: the official acceptance letter from your German university. It must be signed, dated, and clearly state the program name, start date, and duration.
If your letter is in German or another language, a certified translation is mandatory. Think of a certified translator as the official “translator‑to‑the‑German‑embassy” – they add that extra stamp of legitimacy.
2️⃣ Financial proof – the dreaded blocked account
German authorities want to see you can cover roughly €11,208 per year (about €934 per month). The most common way to prove this is a blocked account (Sperrkonto).
Here’s a quick snapshot of the steps:
- Choose a bank or an online provider that offers Sperrkonto services.
- Open the account early – it can take a week for the paperwork, and longer if you’re applying right before the semester starts.
- Deposit the full amount in euros. The bank will freeze the funds and release a fixed monthly sum to you.
- Ask the bank for an official confirmation letter – this is the document you’ll attach to your visa file.
Need more detail on the blocked‑account process? the study‑in‑germany guide breaks it down step by step.
3️⃣ Health insurance – you can’t skip it
Germany requires comprehensive health coverage for the entire stay. If you’re a student, the public statutory insurance (gesetzliche Krankenversicherung) is the simplest route.
Private plans work too, but they must meet the same coverage standards. Make sure the certificate states the start and end dates matching your visa period.
4️⃣ Passport, photos, and visa application form
Your passport needs at least six months validity beyond your intended stay. Grab two recent biometric passport photos (white background, no glasses).
Fill out the long‑stay visa application (Form AN) online, print it, and sign it. Double‑check every field – a tiny typo can send your file back for correction.
5️⃣ Supporting documents checklist
To keep your folder tidy, create three separate sections: Admission, Finance, and Insurance. Here’s a printable checklist you can copy:
- Original admission letter + certified translation.
- Blocked‑account confirmation letter (or scholarship award letter covering the full amount).
- Proof of health insurance (certificate, policy number, validity dates).
- Valid passport (copy of data page) and two biometric photos.
- Completed visa application form (signed).
- Proof of accommodation (rental contract or university dorm confirmation).
- Proof of language proficiency (if required by the program).
- Visa fee receipt (usually €75, paid online or at the consulate).
Does your checklist feel overwhelming? Break it down day by day: Monday – gather university letters, Tuesday – sort out the blocked account, Wednesday – secure insurance, and so on.
6️⃣ Certified copies and notarisation
Some banks and consulates require that your passport copy and the admission letter be certified by a German consulate or your home‑country embassy. Don’t send scans by email unless the bank explicitly allows it – original documents are the rule.
When you’re unsure, call the consulate. A quick phone call can save you a trip later.
7️⃣ Backup, backup, backup
Print every document twice. Keep one set in a folder you’ll bring to the visa appointment, and store the other set in a secure cloud drive (Google Drive, Dropbox, etc.). If a paper gets lost, you’ll have a digital copy ready to re‑print.
Pro tip: label each page with a simple code – A1 for admission, F1‑F3 for finance, I1 for insurance. It makes the officer’s job easier, and they’ll appreciate the organization.
8️⃣ Timing is everything
Biometric appointments fill up fast, especially in July and August. Aim to book your appointment at least three months before your semester starts.
Got a tight deadline? Some banks offer expedited blocked‑account processing for an extra fee – it’s worth the peace of mind.
So, are you ready to turn that paper chase into a smooth, step‑by‑step routine? Grab a pen, tick off each item, and you’ll walk into the consulate with confidence.
According to the German Foreign Office’s official checklist, these are the exact documents the embassy expects. Having them all in order dramatically cuts processing time.
Step 3: Submit Application & Pay Fees
Okay, you’ve finally got all your papers stacked the way the consulate likes them. Now it’s time to actually hand everything over and get that €75 fee out of the way.
First thing’s first – log into the German visa portal for your country. The site will ask you to upload each document as a separate PDF. Don’t try to cram everything into one big file; the system rejects it and you’ll end up rereading the same checklist for the hundredth time.
Upload checklist
- Completed long‑stay visa form (AN) – signed and dated.
- Passport data page scan (ensure six‑month validity).
- Two biometric photos (white background, no glasses).
- Official admission letter + certified translation.
- Blocked‑account statement or scholarship award letter.
- Health‑insurance certificate covering the full study period.
- Proof of accommodation (rental contract or dorm confirmation).
- Motivation letter or study plan if your embassy requests it.
Once the uploads are confirmed, the portal will prompt you to pick a biometric appointment. Here’s a little secret: slots disappear fastest in July and August, so treat this like booking a concert ticket.
Pick a date that gives you at least two weeks before your program starts – that buffer covers any unexpected document requests.
Pay the visa fee
The German student visa fee sits at around €75 — that’s what you’ll see on the payment page. You can usually pay by credit card or a direct bank transfer; the portal shows a QR code for quick mobile payment.
If you’re worried about the fee, remember it’s non‑refundable, but it unlocks the right to stay in Germany for up to 90 days while your application is processed. Visa fee information confirms the amount and the typical processing window of up to three months.
After you hit “pay”, you’ll get a confirmation email with a PDF receipt. Print that receipt and tuck it into your folder – the officer will ask to see it at the interview.
What to bring to the appointment
On the day of your biometric appointment, arrive early. The consulate will scan your passport, take fingerprints, and then call you into the interview window.
Bring these items in a single, clearly labeled envelope:
- Printed receipt of the visa fee.
- All original documents listed above (original passport, originals of any certified copies).
- One extra set of copies in case the officer wants to keep a duplicate.
- A short, handwritten note with your contact details – it shows you’re organized.
During the interview, the officer will glance at your folder, ask why you chose Germany, and maybe probe your financial proof. Keep your answers concise, honest, and friendly. If you’re unsure about a detail, it’s okay to say, “I’ll double‑check and get back to you.”
And here’s a tip that saves nerves: practice a two‑minute “elevator pitch” about your study plan. Imagine you’re explaining it to a friend over coffee – that’s the tone you want.
After the interview
The consulate will usually give you a date when to expect a decision. Some offices email a PDF link; others call. Keep an eye on your inbox and be ready to upload any extra documents they might request – you’ve already got the digital copies in the cloud, right?
If everything’s in order, you’ll receive a sticker in your passport. That’s your german student visa, good for 90 days of entry and the first semester.
Finally, as soon as you land, remember you have two weeks to register at the local Ausländerbehörde and apply for a residence permit. That step extends your stay for the whole study period and lets you work part‑time.
Bottom line: treat the submission as a mini‑project with its own timeline, checklist, and budget. When you check each box, the stress melts away and you’re one step closer to walking through a German university campus.
Step 4: Attend Visa Interview & Prepare for Arrival
So you’ve booked that biometric slot and the interview date is circled on your calendar. It’s normal to feel a flutter of nerves – you’ve already gathered the paperwork, now it’s about showing up and convincing the officer you’re ready for German university life.
What if the officer asks something you didn’t anticipate? The trick is to keep your answers short, honest, and peppered with a personal touch. Think of the interview as a quick coffee chat, not a courtroom.
What to Expect at the Interview
The consulate will scan your passport, take your fingerprints, and then hand you a folder of your documents. They’ll glance at your admission letter, blocked‑account statement, and insurance certificate before asking you a few “why Germany?” questions.
Typical prompts include:
- Why did you choose this specific program?
- How will you finance your stay?
- What are your plans after graduation?
Answer with a sentence or two, then pause. If you’re unsure, it’s perfectly fine to say, “I’ll double‑check that detail and get back to you.” It shows you’re thorough, not evasive.
Pro tip: practice your “elevator pitch” in front of a friend. Imagine you’re explaining your study plan over a latte – that tone keeps you relaxed and authentic.
Packing the Essentials
When the interview is done, you’ll walk out with a visa sticker (or a PDF that you’ll print later). That’s your ticket to board the plane, but you still need a mini‑checklist for the journey.
Here’s a quick rundown of what to pack in your carry‑on:
- Passport with visa sticker (keep it safe, not in checked luggage).
- Printed copies of all original documents – admission letter, blocked‑account proof, health‑insurance certificate.
- One extra set of photocopies for the Ausländerbehörde.
- Proof of accommodation in Germany (rental contract or dorm confirmation).
- Small amount of euros for the first few days (transport, snacks).
Don’t forget a reusable water bottle and a portable charger – you’ll be juggling train tickets and Google Maps the moment you land.
First Days in Germany
Within two weeks of arrival you must register at the local Ausländerbehörde and apply for a residence permit. It sounds bureaucratic, but the process is smoother if you’ve already organized your paperwork.
Bring these items to the registration office:
- Passport with visa.
- Signed rental contract.
- Proof of health insurance.
- Completed residence‑permit application form (often available online).
Most offices will issue a temporary Aufenthaltstitel on the spot, letting you stay legally while the full permit is processed.
And while you’re waiting, soak up the city – Germany isn’t just lectures and labs. From the Brandenburg Gate to a cozy beer garden, there’s a whole cultural side that’ll make your stay unforgettable. Prospects notes that Germany blends academic excellence with a rich cultural experience, so treat your first weekend as a chance to explore.
Quick Comparison Table
| Item | When to Use | Key Tip |
|---|---|---|
| Visa Sticker | Entry at the airport | Check the expiry date; it’s good for 90 days. |
| Residence Permit Application | Within 2 weeks of arrival | Bring originals and one copy of every document. |
| Blocked‑Account Statement | At the interview & Ausländerbehörde | Make sure the balance shows €11,208 or higher. |
Bottom line: the interview is just one checkpoint. By treating the whole arrival process like a checklist project, you’ll move from “I’m nervous” to “I’ve got this” in no time.
So, are you ready to walk into that consulate with confidence, and then step onto German soil with a clear plan? Grab your folder, rehearse your story, and let’s make that dream campus a reality.
Step 5: After Arrival – Register & Extend Your Stay
You’ve just stepped off the plane, the air smells of fresh pretzels and a hint of diesel from the trams, and now the real paperwork begins. Don’t panic – think of it as a quick pit stop before the marathon.
First thing’s first: you need to register your address. In German, that’s called Anmeldung and it happens at the local Einwohnermeldeamt (residents’ registration office). Most towns open their doors Monday to Friday, but some smaller cities have a half‑day schedule, so double‑check the hours before you go.
How to nail the registration
Grab the following items:
- Your passport with the visa sticker.
- The rental contract or a confirmation from your university dorm.
- A completed registration form (you can download it from the city’s website).
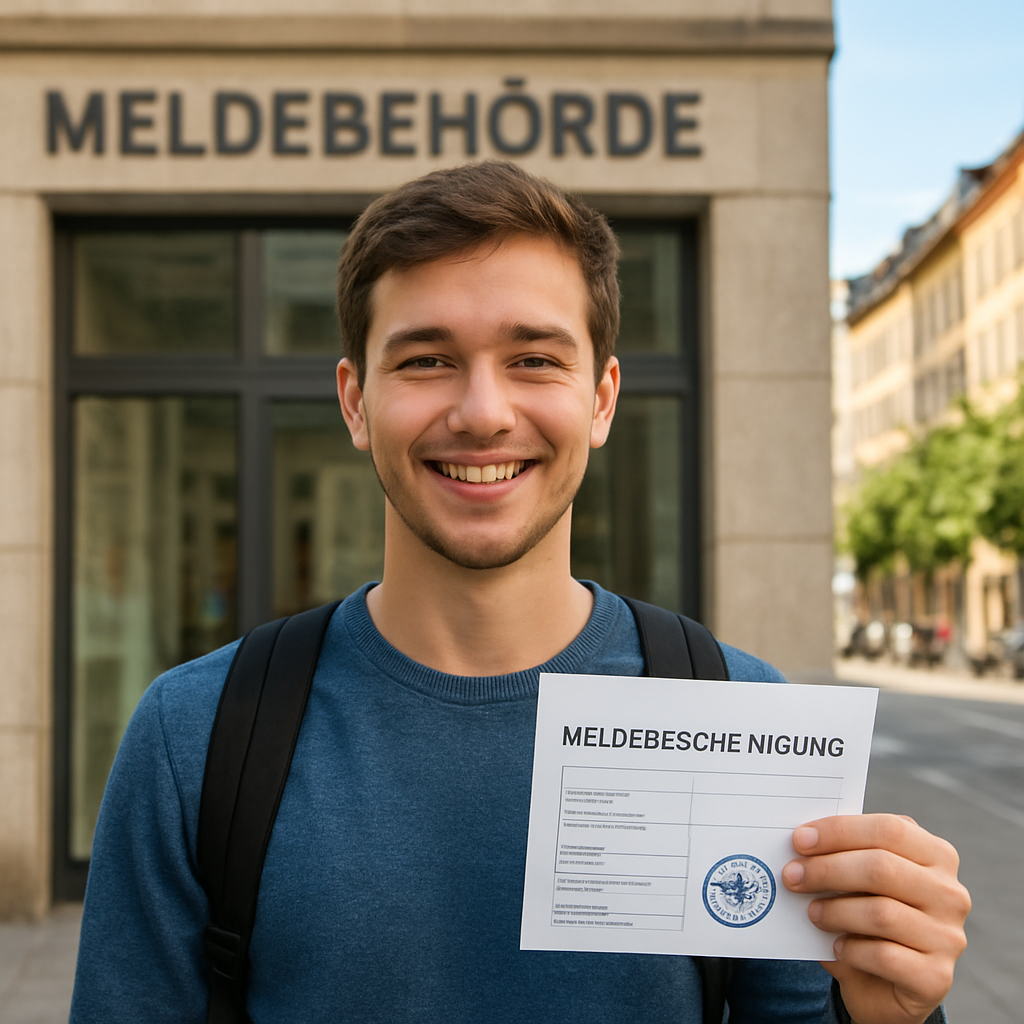
When you walk in, hand over the documents, sign a few lines, and the clerk will stamp a small paper called Meldebescheinigung. That tiny slip is gold – you’ll need it for the next step and for opening a bank account.
Why does this matter? The registration proves you have a right to stay in Germany beyond the initial 90‑day visa period. The city’s office will also issue a document stating your “right to remain,” which is essentially a mini‑permit until your full residence permit arrives according to the university’s visa guide.
So, you’ve got the Meldebescheinigung. What’s next?
Apply for the residence permit (Aufenthaltstitel)
Within two weeks of landing, head to the Ausländerbehörde (foreigners’ authority). Bring:
- The Meldebescheinigung.
- Your passport with visa.
- Signed rental contract.
- Proof of health insurance.
- Proof of financial means – usually the blocked‑account statement showing at least €11,200 or a scholarship award.
- Completed residence‑permit application form (often available online).
Most offices will give you a temporary Aufenthaltstitel on the spot. It’s a small card that lets you stay legally while the full permit is processed – think of it as a “stay‑while‑you‑wait” badge.
Pro tip: ask the clerk for a copy of the receipt and keep it with your other documents. If anything goes missing, you’ll have proof you showed up.
Now that you’ve secured the temporary permit, you can breathe a little easier and start exploring the city. But remember, the student visa only lasts for the first semester. You’ll need to extend it before it runs out.
When and how to extend your German student visa
Mark your calendar – aim to start the extension process at least a month before your current permit expires. The exact timing can vary by state, but a month gives you a comfortable buffer for the office to do its checks.
The extension paperwork looks a lot like the original application, but there are a few twists:
- Sometimes you’ll need to submit a recent transcript if you’re extending beyond the original study period.
- The bank statement should show three months of transactions and still meet the minimum balance (many offices now accept as low as €5,000, though some still expect €8,800 or even €10,200) as students share on a German study forum.
- If you’ve landed a part‑time job, a work contract can lower the required amount.
Bring the same set of documents you used for the initial residence permit, plus the new bank statement and any updated proof of health insurance. You’ll also have to record fingerprints again – it’s a quick swipe, not a big deal.
After you hand everything in, the office usually takes one to two months to issue the new card. Some states are faster, others slower, and nationality can play a role, but the one‑month‑early rule usually covers you.
While you wait, keep your student status active: attend classes, keep up with coursework, and maintain your health insurance. If the office asks for proof of enrollment, a simple “Immatrikulationsbescheinigung” from your university will do.
Bottom line: treat the extension like a mini‑project. Create a checklist, set reminders, and keep copies of every document in both paper and cloud. When the new card arrives, you’ll feel that sweet sense of “I’ve got this” all over again.
And hey, once the paperwork is done, you finally have time to enjoy that Berliner Currywurst you’ve been dreaming about.
Conclusion
Wow, you’ve just trekked through every twist of the German student visa maze – and guess what? You’re now armed with a real‑world checklist, not just theory.
From proving your admission and financing to nailing the biometric interview, each step feels like a tiny project you can actually finish. Remember the “one‑month‑early” rule? It’s that simple reminder that a little buffer saves you weeks of waiting.
So, what’s the next move? Pull out the list we built together, set calendar alerts for document renewals, and upload a digital copy of everything to the cloud. That way, if the Ausländerbehörde asks for an extra page, you won’t scramble.
And don’t forget to celebrate the small wins – a stamped visa sticker, a printed Meldebescheinigung, that first German coffee you’ve been dreaming about. Those moments keep the motivation alive while you settle into campus life.
Ready to turn the paperwork into a smooth launchpad for your studies? Grab your folder, give yourself a pat on the back, and step into Germany with confidence. Your adventure starts now.
Keep this guide bookmarked, revisit the checklist before each deadline, and if any step feels overwhelming, consider reaching out for personalized support – a quick call can save you hours of guesswork.
FAQ
What documents are absolutely required for a german student visa?
First up, you need a valid passport that stays good for at least six months after your planned stay. Then grab the official admission letter from your German university – it has to be signed, dated, and include your program name, start date, and duration.
Next, proof of financial means. Most students open a blocked account (Sperrkonto) with a balance of around €11,200 for the year, and you’ll attach the bank’s confirmation letter. Health insurance that covers the whole period is non‑negotiable, whether you pick the public statutory plan or a private one that meets German standards.
Finally, two recent biometric passport photos, a completed long‑stay visa form (Form AN), and a copy of your passport data page. If you’re staying in university housing, a rental contract or dorm confirmation also goes into the folder.
How early should I apply for the german student visa?
Most consulates open their windows three months before the semester starts, and that’s the sweet spot. Applying earlier gives you breathing room for biometric appointments, which fill up fast in July and August, and it cushions any surprise document requests.
If you’re aiming for a fall semester, try to submit by early May. For a spring intake, late October or early November works best. The “one‑month‑early” rule we mentioned earlier is a handy reminder: set your deadline a month before the official deadline to avoid last‑minute stress.
Can I use a scholarship instead of a blocked account?
Yes, but the scholarship has to cover the full amount that the German authorities expect – roughly €11,200 per year – and you need an official award letter that clearly states the amount, duration, and that it’s disbursed directly to you.
Make sure the letter is translated into German or English by a certified translator if it’s in another language. Some embassies still ask for a blocked‑account statement as a backup, so keep that option open until your scholarship is fully verified.
What happens if my visa is rejected?
A rejection can feel like a punch, but it’s usually not the end of the road. The consulate will send a written explanation – read it carefully and note which document or detail was missing.
Most issues are fixable: a missing translation, an outdated passport, or an insufficient fund proof. Gather the missing pieces, pay the €75 fee again, and book a new appointment. If you’re unsure why it was denied, consider a short consultation with a visa‑support service to avoid the same mistake twice.
Do I need to translate every document?
Anything that isn’t already in German or English must be translated by a certified translator. That includes your admission letter, scholarship award, and any official certificates. The translation should carry the translator’s stamp and signature, otherwise the embassy will send it back.
A quick tip: ask the translator to include a short note confirming that the translation is accurate and complete – it saves you a back‑and‑forth call with the consulate.
How long does the german student visa stay valid once I get it?
The sticker in your passport is good for 90 days of entry and the first semester of study. After you land, you have two weeks to register at the local Einwohnermeldeamt and apply for a residence permit (Aufenthaltstitel) at the Ausländerbehörde.
The residence permit is usually issued for one year and can be renewed each semester as long as you stay enrolled and keep proving financial means. Remember to start the renewal process at least a month before the current permit expires.
What are the biggest pitfalls students overlook?
First, forgetting to check passport expiry – a six‑month buffer is a must. Second, underestimating the time it takes to open a blocked account; some providers need a week or more, so start that early. Third, skipping the certified translation step until the last minute, which can delay your whole application.
Lastly, don’t ignore the biometric appointment deadline. Book it as soon as the portal opens, and treat the appointment like a concert ticket – you’ll regret missing it if you wait.
Остались вопросы? Запишитесь на Консультацию!
Получите ответы на ваши вопросы на индивидуальной онлайн консультации с нашим специалистом
Записаться!